Snowmobile loading project version 3

Snowmobile loading project version 3

Introduction

The Author has been building devices for snowmobile transport for years. The earlier versions was based on "enclosures". Later plans were realized for the open approach with a "ramp" for loading. However, over the years the unloading step was getting more difficult. This was mainly from no reverse function on the sled. Most current sleds have reverse however, this version will work with either type of sled. The Author removed the "enclosure" / canopy approach a few years ago. This worked well for easy access of the sled post-prep as well. Exposure to the elements did not appear to be an issue. For an overnighter-snowy time a simple tarp could keep the new snow off the sled. Therefore, all but the actual deck/ramp was removed.

Most ramps are steep. This requires a tricky loading procedure especially at the end of the day under icy conditions. It's also rough on the belt when you need to "creep" up to the loading position for the ski bracket to be secured. Also, during unloading there's a considerable amount of pulling effort involved. Occasionally, the lower part of the ramp (and guides) were missed; requiring pulling the sled off and taking another try at loading. At the end of the day this could be a pain. The other factor was lifting the rear of the (loaded) sled to permit the ramp part to be loaded under the track.

A few years ago, a buddy built a tilting ramp system. It appeared to work okay in the fact once the sled was loaded on the steep ramp it could be tilted and pushed into the truck's bed. However, the steep loading part was still a strain on the operator and the driven belt, creeping up into position for the bracket. The Author considered a better way using the truck's (moving) energy. For unloading a rope was tied on the rear of the sled with the other on an "anchor" such as a tree or another truck. This worked fairly well however, was dependent on such anchor. Also, this still did not address the loading issues. Also, the sled needed to be loaded on an easy angle, then the truck could do the conversion for the angle of the ramp. Future design needed to be self-sufficient and energy efficient (transfer of stored energy, using gravity as well).

After considerable engineering and research the solution was found. Three main factors were planned for this version:

  • 1: Easy unloading.

  • 2: Easy loading.

  • 3: Use the truck's energy to help with this.

    This version is different in the fact the ramp center point is at the tilt point like a cantilever carriage. It's a single load for the back of a pickup truck. It requires your truck's tailgate to be removed, which is a simple task for most models. This system could be used on any full-size truck in most cases. The only exception is the front wheel spacing may need adjustment. This depends on the truck's bed hills/valleys normally found on current truck beds. The wheels should run in the valleys.

    The ramp weighs in at 204 pounds, while the hitch attachment is 51 and the ski bracket 9. The truck should handle this weight plus the sled just fine. The steel costs around $250 (depending on the current market and duty). The plastic runners were free (old truck bed). Other 1" strapping used is with 2 carabiners and 2 shackles. Red color was chosen for rear safety. The cost for sewing the strap ends (commercial vender) was $20. If you have a heavy duty machine you can sew it yourself. The hitch attachment was built in such a way to provide a clear view of the license plate (for obvious reasons).

    All the components can be removed for summer storage. Obviously, you'll need a little help with the (heavy) ramp. The Author uses a rafter lift with a "boat" winch to store the unit out of the way. If you are equipped to weld aluminum that would be a plus for weight.

    The ramp's frame is steel square tubing with a size of 2" x 3" x .120" thickness and length of 10'. The front part also uses the same tubing. For the wheel tracks 2" x 1" x .188" thickness steel channel was used and a length to fit inside the frame. An afterthought showed you could use .120" thickness to save a little weight and cost. For the wheels are two 4" casters, positioned upside down to met with the channel. While they were bought at the local Harbor Freight (Chinese junk) the weight rating of 400 lbs (each) was adequate for this application at $8 each. For the cross bars (for the sled's track to grab) is 1" x 1" x .188 thickness steel. This thickness is needed to ensure they don't sag in time. A few loops were welded on the frame for securing the strapping (and summer storage).

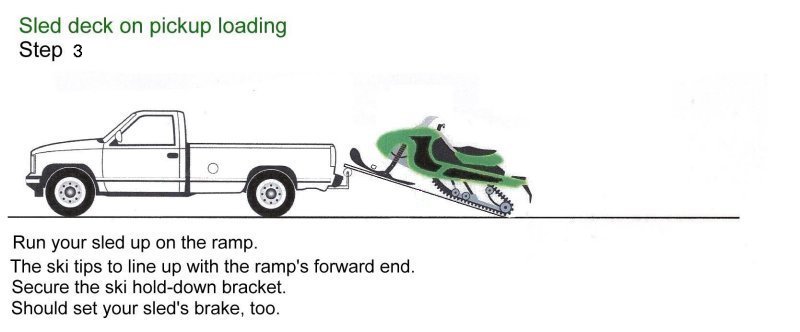
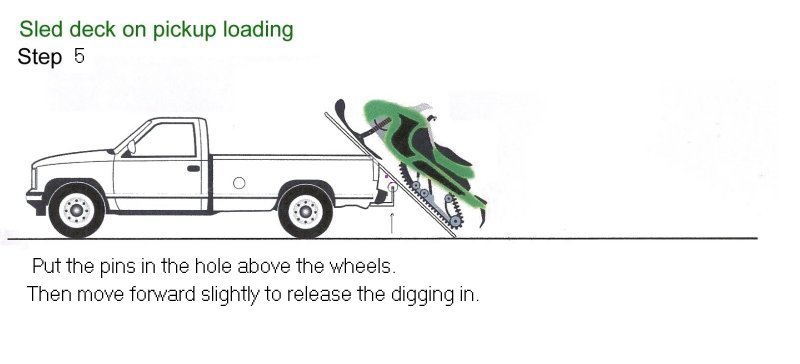
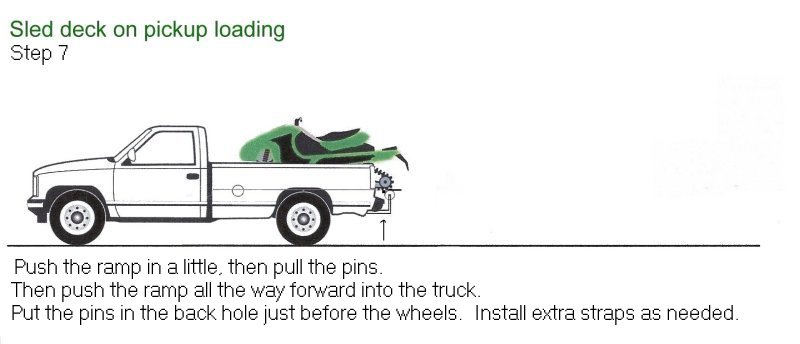
    Pictures of the actual components were not available therefore, animations illustrate the steps, below.


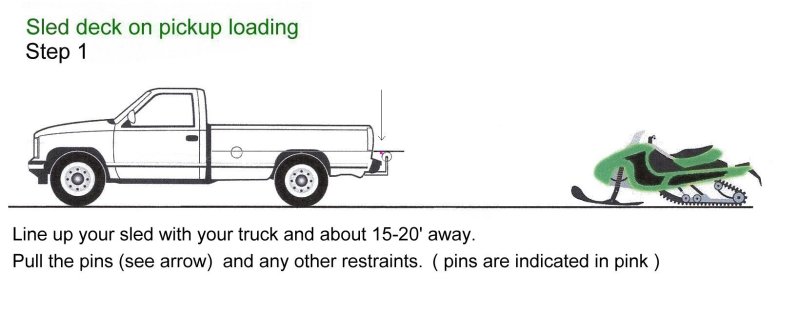
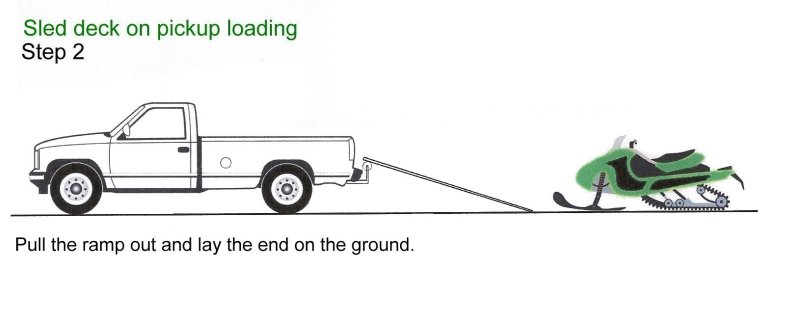
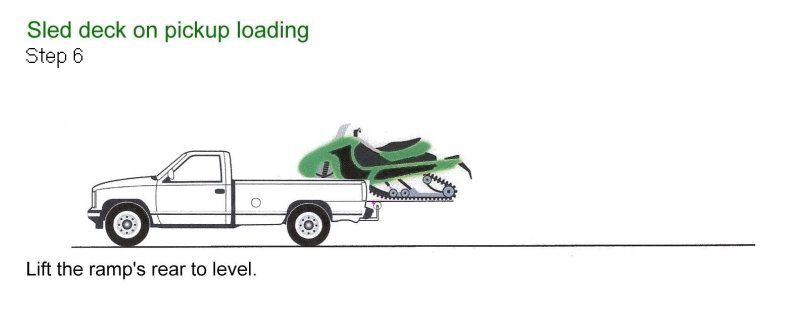
    For unloading it's pretty much the reverse (no pun) order. One thought; While leaving the pins in the forward position and the sled's brake set, pull the ramp out and lower the end of it to the ground. Remove the ski bracket. Then release the sled's brake and let gravity run your sled down the ramp most of the way. Of course, if your sled has reverse, this is moot.


    [Karl's sled page]