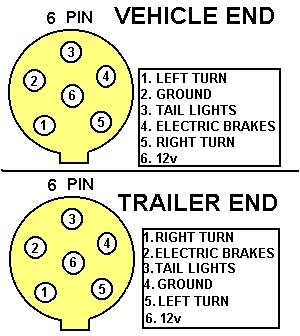
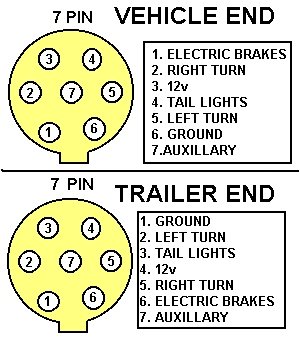
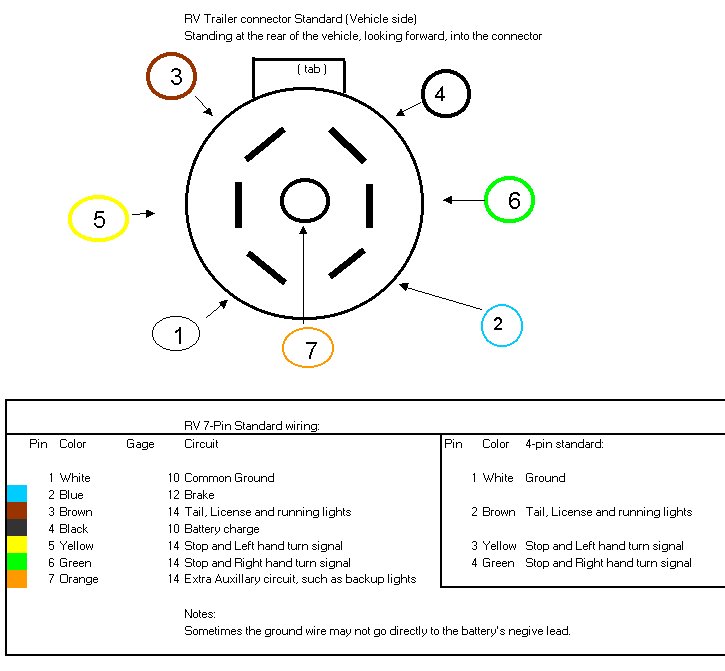
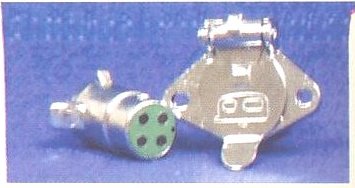
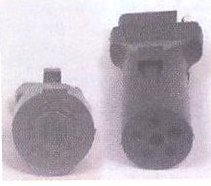
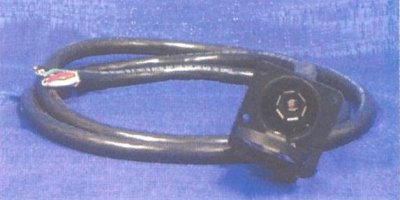
Trailer wiring can be that little annoying detail that got left out, and comes to a head, just before you are headed out on that trip, or you trade with anther party either vehicles and/or the trailer, just to find out you might have a splicing job to do on the side of the road. Don't let this happen to you. This document will help prevent that, by better understand the standards of wiring in the U.S. There's basically 4 standards, depending on the trailer size, and a few other factors. They are 4,5,6, or 7 wire systems. Here, you can compare the 6 and 7 pin type and whether it's for the tow vehicle or the trailer. These first two pictures are for the 6 and 7 pin type, however only for the "round" type PINS, and not to be confused with the housing's round part. This type is sometimes used in heavy equipment hauling.
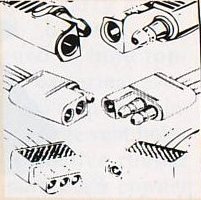
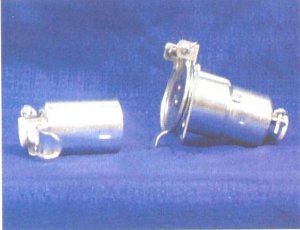
Here's the other type (and the most current and common) being FLAT pins with the round housing. Not to be confused with the mentioned (above) type this type is also called the "RV" type receptacle. This type is used for domestic use, such as travel trailers and is very common OEM type in tow vehicles with factory "towing option" installed. Factory usually mounts this receptacle just under the bumper, or in the Ford F250 early pickups, sometimes way, back and up inside the bumper area. You'll need to crawl around on the floor with a flashlight to see this. Also, if you plan to tow a trailer GVW 3500 or more, you'll need electric brakes on the trailer, and a controller install in your tow vehicle. In this case you will need to buy the controller (around 100 bucks) plus and adaptor (short) cable that plugs into this controller and your vehicle's trailer option wiring harness. The vehicle's hardness usually has a "pigtail" tucked away, from the factory that you locate, pull out and plug into. It's usually a 4 or 6 pin in-line receptacle, sometimes under the dash board, by the heater or center hump. Call you dealer to verify.
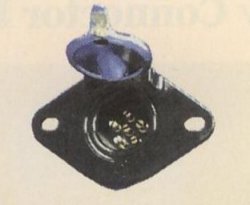
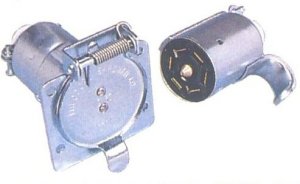
Some times OEM using different colors from the "RV" standard, so watch out for that. If you do see it, a simple "cheat sheet" of color conversion can help, so you don't have a need to re-wire the vehicle. That was also notice between 7 and 4 pin wire colors. If you are working/installing the wiring, and connecting up the wires, then the opposite view might come into play, as with these two pictures of the 7-pin show this, just to avoid confusion. You may be working underneath the gas tank area, looking back. The reason this is explained to this level, most of the installation time and your prospective will be in this matter; while wiring up the connections, the receptacle will be in your hand and you will be looking at the "front" part, where the screw terminals are. Also another note; The notch on the bottom is for the receptacle's alignment while being pushed back into the "shell" (casing) of the connector, NOT for the plug's alignment. The plug's alignment uses a wider notch, normally at the top of the round receptacle. It's just little details like these can further prevent confusion.
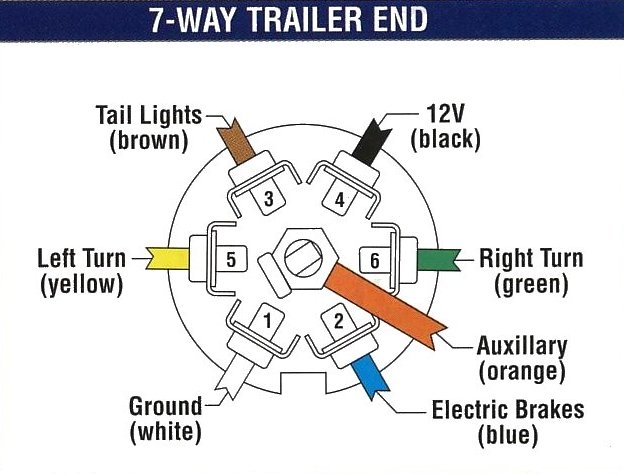
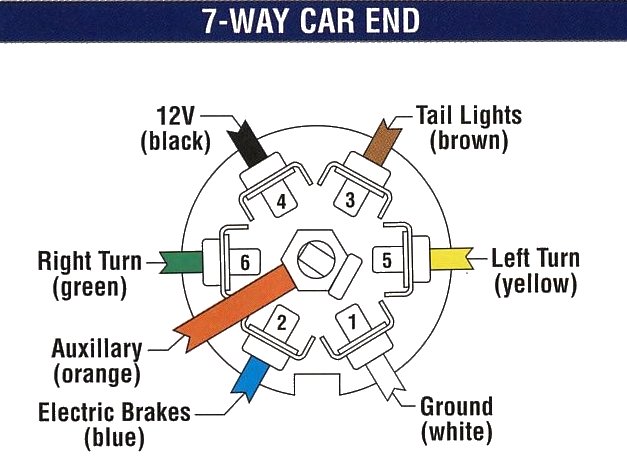
Since most of the Sled trailers deal with either 7 or 4 pin, that will be most of the discussion. On the 7 pin, when troubleshooting from the outside, or just looking things over this will be the view and standard: (not to be confused with the above paragraph on terminating the wires, inside the connector). Some OEM vehicle manufactures use the 4-pin standard colors, therefore, some conversion with two wire colors may be needed. The end result will be the same for the physical pin arrangement. Two notes to remember;most systems don't use pin 7 (center) and some brake controllers will not operate without a trailer plugged into the receptacle. Either controller outputs variable pulses (duty cycle), depending on the braking demand.
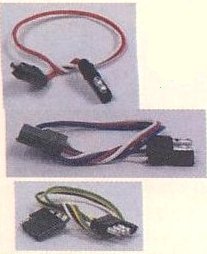
There's usually several choices are your local RV dealer; here's most of them; connectors, plugs, adaptors, both in metal and plastic. With the 4-pin flat you don't have top notch alignment issue; the one ground pin is polarized opposite of the other three pins for proper alignment. The picture is for a 2 or 3 pin, but the same applies, here. For the 4-pin make note there are at least two different sizes. Take that into consideration when deciding which type to go with.
And the 5-pin version.......with a handy cover for them.
These are the round type for heaver duty that come in 4, 5, 6 or 7-pin versions.

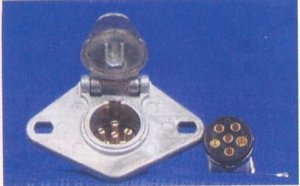
For the 7-pin is a flat blade version used widely in larger trailers and RVs. It's also OEM for many towing packages for pickups.
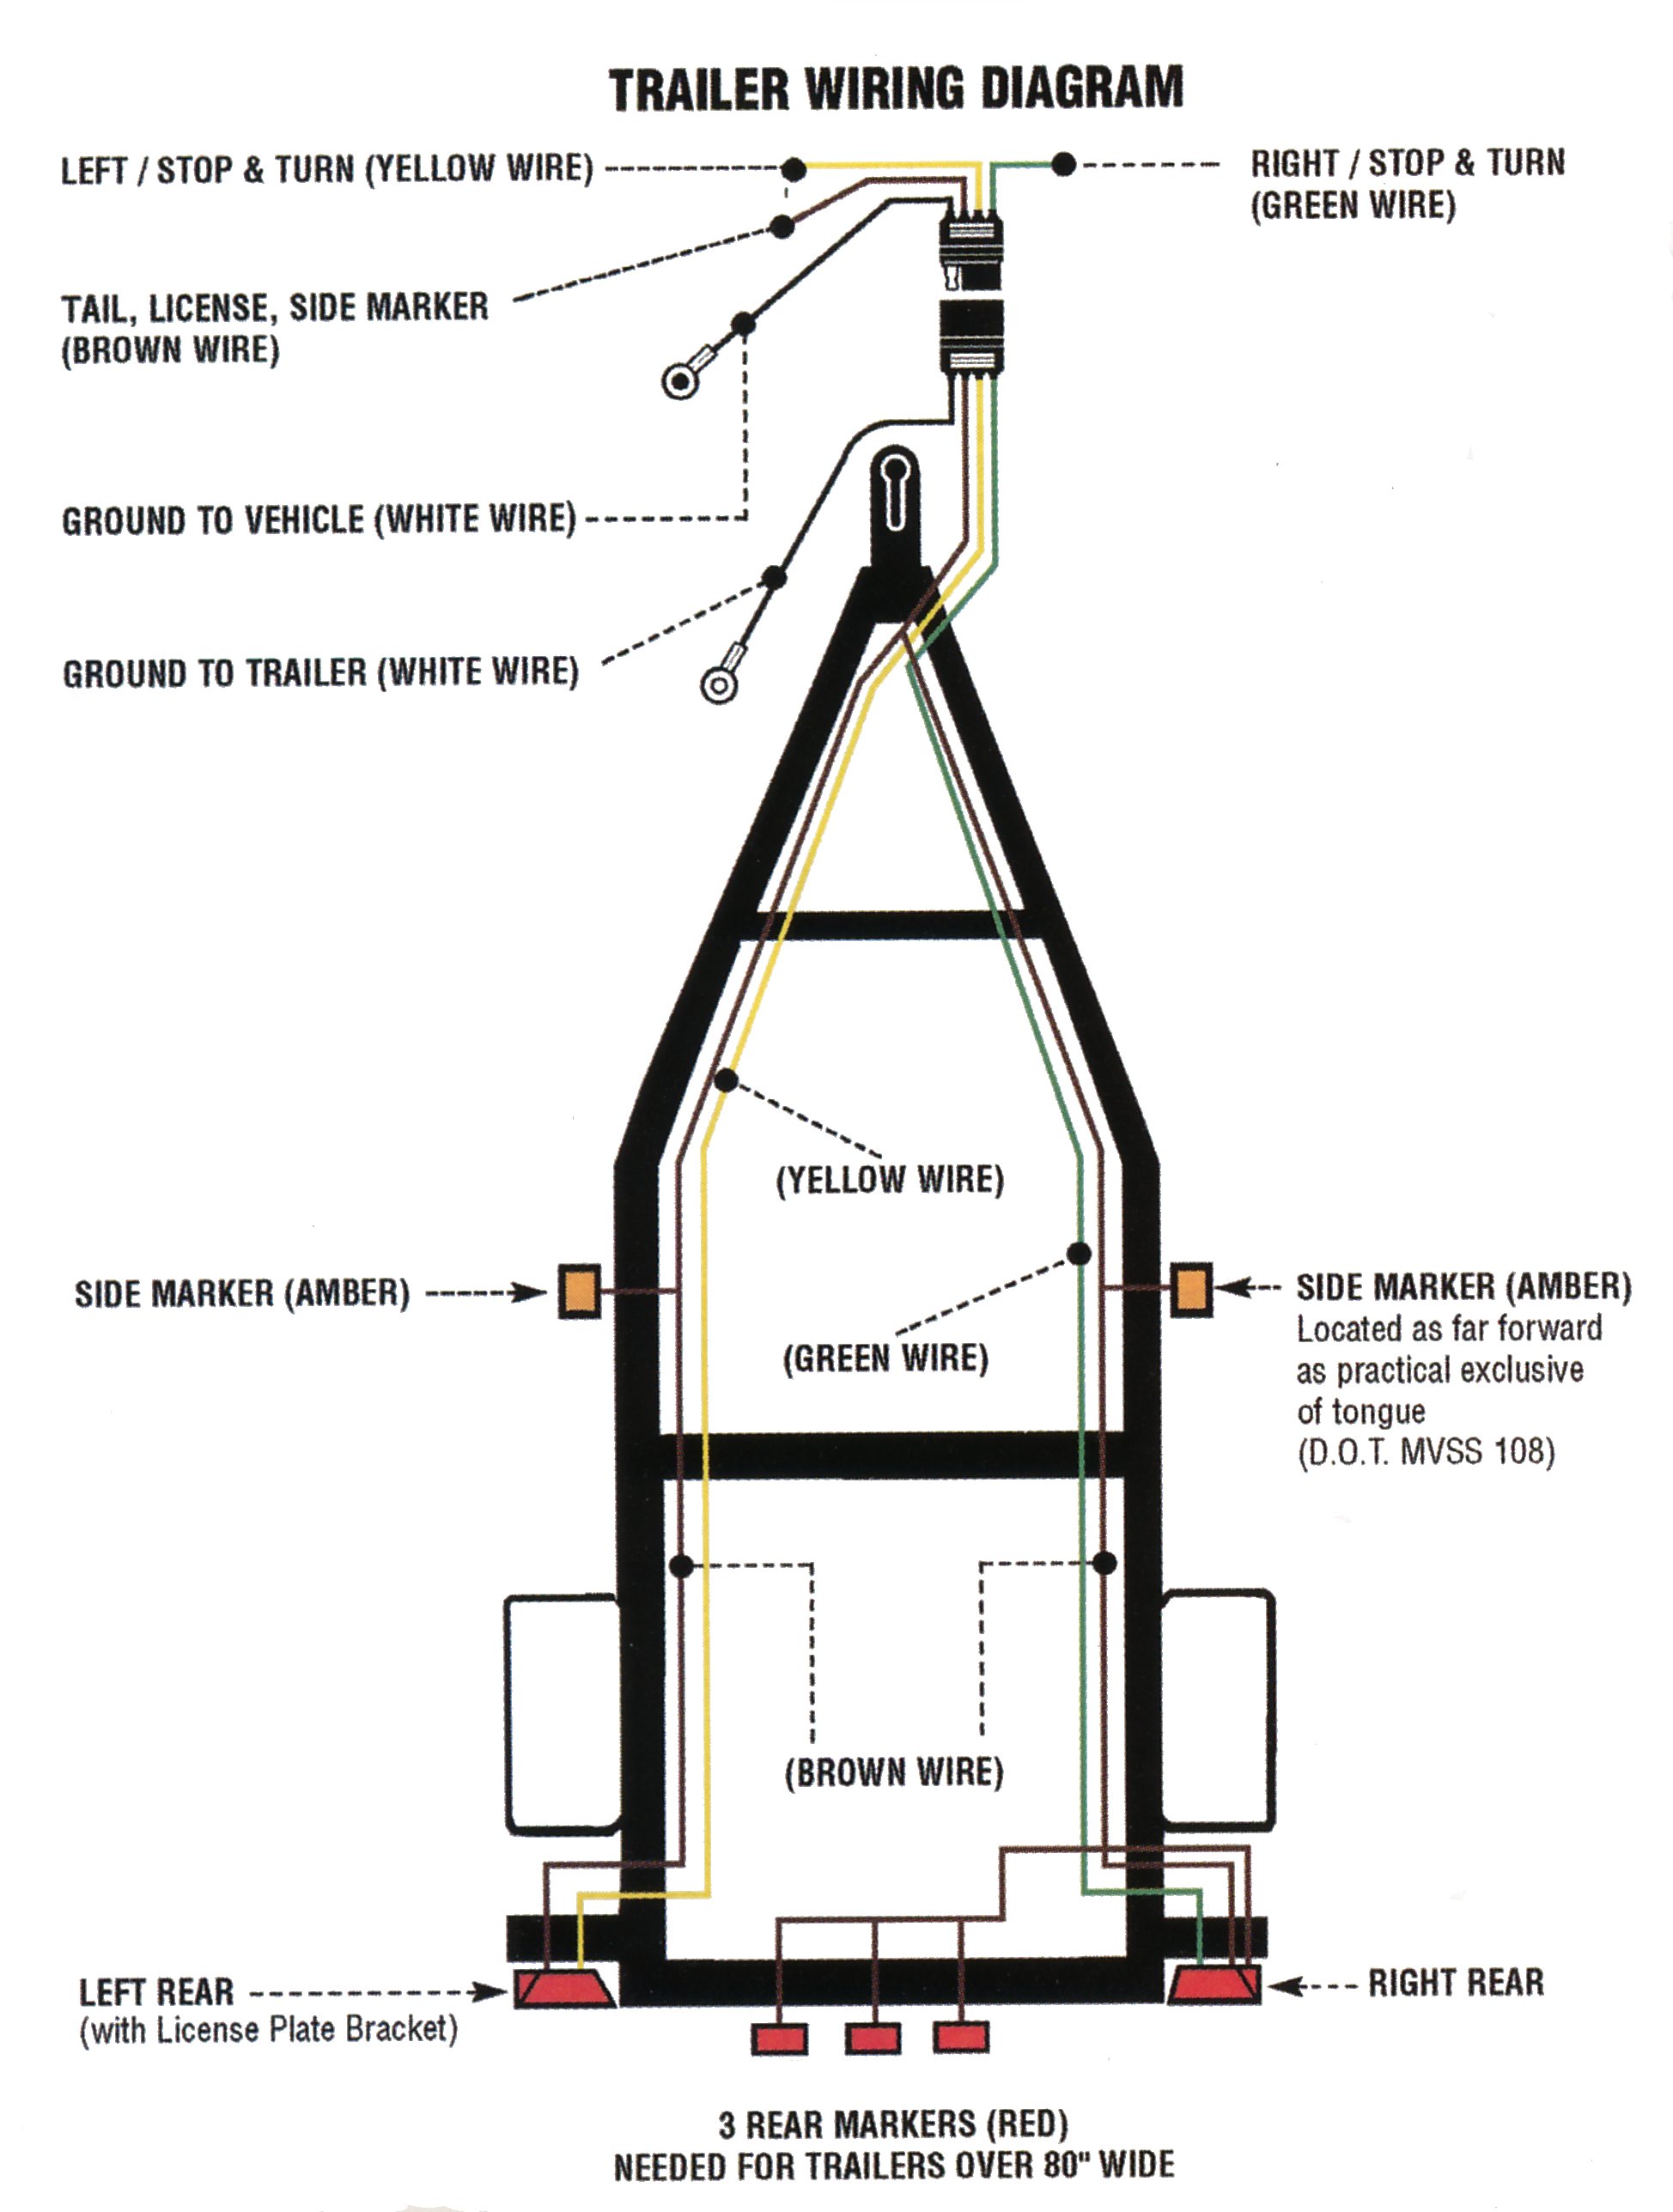

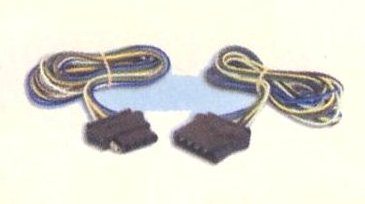
Wiring a smaller trailer there are standard wire colors. You don't have use the exact colors, however they can help in troubleshooting a problem, later. Here's a couple of diagrams, and if you want a huge version of this picture, just click on them. The larger version of the diagram on the right should be adjusted properly to be printed directly from you I.E. browser, version 6.0 or later.
For towing heavy loads, over 3500 lbs, most states require brakes in the trailer.
For real big loads, such as hauling a larger tractor tandem axle and brakes on both axles are needed.
There are several manufactures for electric brake controllers, however the author prefers products from NAPA stores.
NAPA sells a product made from Valley Industries .
The author choose model # 52740.
Generally there are four wires coming out of a controller, which is power (black wire), ground (white wire), brake signalling (red wire) and output to trailer brake coils (larger blue wire). Why these strange colors were chosen (also on trailers, for that matter) is an unknown. For custom installations, from scratch, you can wire your tow vehicle with these wires. For modern vehicles, with the factory "towing package" this is not necessary, as there is usually a receptacle to plug into. To do this you'll need to purchase a "pigtail" that plugs into the receptacle, then splice into the wires coming out of the controller. Most of these receptacles are under the dash board area, but check your owner's manual for the location on your specific vehicle. Plan on a mounting location that's easy to reach, while you are driving. Several of the new type of controllers don't need to be mounted level, but do need to be secured and not rolling around the floor.
In 2007 the Author drew up a nice diagram for a typical "car-trailer" tandem axle type, with some wiring corrections/additions to the current "standard" for 7-Pin RV type plugs.
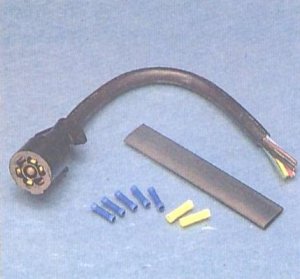
Trailer lights can be a maintenance issue with the older models. In the case of the Author's trailer, being vintage 1984 there was plenty to do. With the above connector information the plug was easily rebuilt, taking apart the "Polak" connector (no-pun there) cleaning the rust and other corrosion off the contacts, stripping clean the 7-wires, soldering lightly the ends and bending them around the new # 6-32 Phillips pad head screws to be tightened down on the flat type blade contacts inside the plug. Taped and RTV sealed the exit point made a rebuilt connector for years of service.
Be aware back then some of the wire color standards were different. With some tracing of the circuits that not an impossible task; just very time consuming. It helps to have a partner to work with; one to check the rear end and running lights while identifying each wire color. Generally the heaver wires are power and ground, which was the case for the Author's old trailer renovation project. For example the heaver white and blue wires were still (-) ground and brakes respectively. The other wires were pieced together and found to be:
For details on lamps used in trailers click here .
![[Karl's sled page]](images/winter_home3.gif)