Thanks to innovative designs that are engineered to fit specific vehicle applications, most hitches can be easily installed with no drilling, welding or other modifications. Wiring kits also help simplify connecting trailer lights and electric braking systems to the vehicle's electrical system. On many applications, a hitch can be installed in 30 minutes or less, including the wiring connections.
Hitches are available from a variety of after market suppliers for a wide range of domestic and import vehicles. Selecting the right hitch for a particular application is the key here, which requires an understanding of the various hitch class ratings and talking with your customer to find out how they plan to use their new hitch.
There are basically two types of hitches: weight-carrying ("deadweight") and weight-distributing ("equalizing"). Weight-carrying hitches are generally, but not always, for smaller, lighter loads. Weight-distributing hitches are generally recommended for larger, heavier trailers.
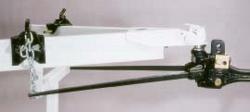
A weight-distributing hitch has an attachment that slides into the receiver to redistribute the weight on the tongue. The hitch typically has two spring bars, one for each side of the trailer, to lift up and apply leverage to the tow vehicle. This redistributes tongue weight from the rear axle to the front and improves vehicle stability while towing.
Class I hitches can handle a gross trailer weight (GTW) of up to 2,000 lbs., and a maximum tongue weight of 200 lbs. The hitch may be a simple drawbar- or step bumper-type of hitch. Other hitches may have a crossbar with a small one-inch or 1-1/2-inch square receiver, or a small 2-inch by 5/8-inch receiver. This type of hitch is often used on smaller cars, mini-pickups and mini vans for bike racks and light-duty towing.
Class II hitches are for loads of up to 3,500 lbs. GTW and 300 lbs. tongue weight, such as a small boat trailer, snowmobile trailer, motorcycle trailer or camper. Typical installation applications include large rear-wheel drive cars, full-size vans, pickups and SUVs.
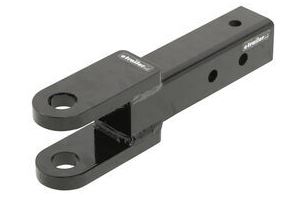
Class III hitches can handle up to 5,000 lbs. GTW and 500 lbs. tongue weight. This type of hitch generally has a 2-inch rectangular receiver and is considered the "standard" type of hitch for general towing.
Class IV hitches are for up to 10,000 lbs. GTW and 1,000 to 1,200 lbs. of tongue weight. This type of hitch is usually a weight-distributing type of hitch.
Class V hitches are for extra heavy loads greater than 10,000 lbs. GTW and more than 1,200 lbs. tongue weight. This type of hitch may have up to a 2-1/2 inch receiver with a 3/4-inch pinhole. Typical uses might be to tow a car trailer, horse trailer or unusually large boat or camper.
For really heavy towing, there are also Fifth Wheel and Gooseneck hitches that mount in the bed of pickup truck.
What's important here is to use a hitch that is strong enough to handle the maximum anticipated total weight of the trailer, but does not exceed the towing capacity of the vehicle. Refer to the vehicle owner's manual for maximum towing and tongue weight limitations. Also, the trailer tongue load should be kept at 10 percent of the loaded trailer weight for weight-carrying (deadweight) hitches, and 12 percent for weight-distributing (equalizing) hitches.
When choosing a hitch, consider not only the customer's current towing needs, but also any future needs that may arise. If he's towing a rowboat today, he may trade for a bass boat next year. If in doubt, its always best to upgrade to a higher class. For most full-size trucks and SUVs, this would mean installing a Class III or IV hitch rather than a Class I or II hitch.
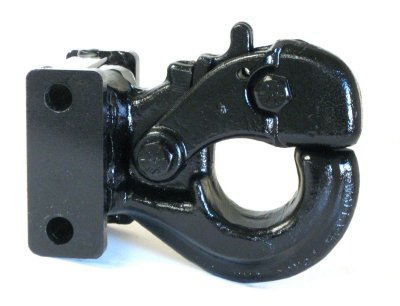
There's two other type of hitches to be aware of; the pintle and clevis. Mostly are used in heavy duty trucks, especially the pintle.
Once you've figured out which class of hitch best suits your customer's towing needs, you also need to consider any other suspension or vehicle modifications that might be beneficial. These modifications may include stiffer springs, air springs, overload or air assist shocks, larger sway bars or even an after market ATF cooler to protect the automatic transmission from overheating. Such modifications may be needed on vehicles that will be used for heavy towing and will be equipped with a Class III, IV or V hitch. Another add-on that improves rear visibility when pulling a large trailer is extended side-mount mirrors.
As for installation, make sure the hitch clears all suspension components, the spare tire (if hung underneath) and the tail pipe, and is securely mounted. Follow the hitch supplier's installation instructions and use the fasteners that are provided.
A final step is to figure out the proper ball height for the customer's trailer. Level the trailer, then measure from the ground to the inside top of the ball coupling on the trailer. Then measure the distance from the ground to the hitch or receiver, and the height of the ball. Use these measurements to determine how much drop or rise is needed in the ball mount or receiver so the trailer will be level.
Here's an idea. On the early Ford trucks there's normally a 1" hole in the bumper. This would be nice to install a "ring bolt" AKA Eye bolt. It could come in handy to pull something out of a stuck, such as a small vehicle or tree. Remember to keep the pulling effort within the bumper's rating or you have a bad day with the bumper also being stuck, lying on the ground, LOL.
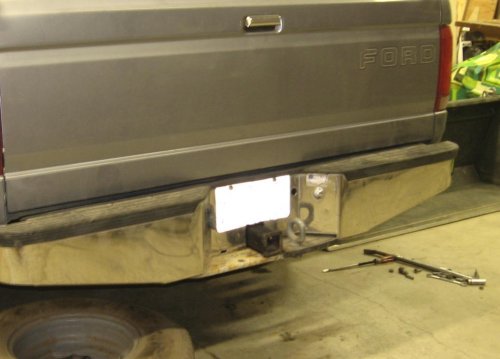
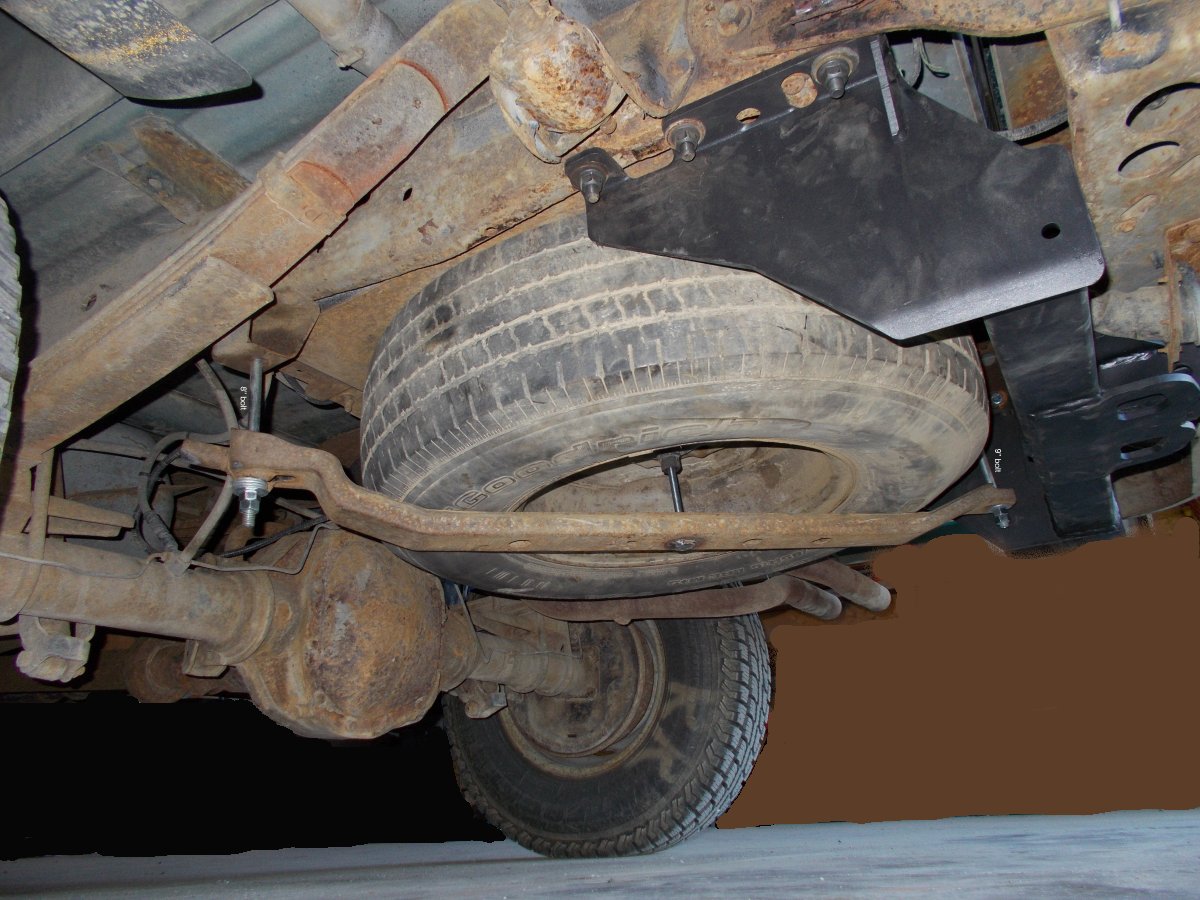
Installing a class five hitch the Curt 15300 fit the bill. Notice the six point, using grade eight bolts. The nuts were also that and the locking type. For this year drilling was required. During some work on this project it was notice the spare tire holder was getting some rust. The OEM hangers-bolts were just about impossible to operate. Therefore, the Author came up with a nice replacement using common grade two hardware. The washers are not only for spacing but additional strength from the hanging forces over the years use. All that's needed during an emergency (tire) situation is a couple of 3/4" wrenches.
![[Karl's sled page]](images/winter_home3.gif)